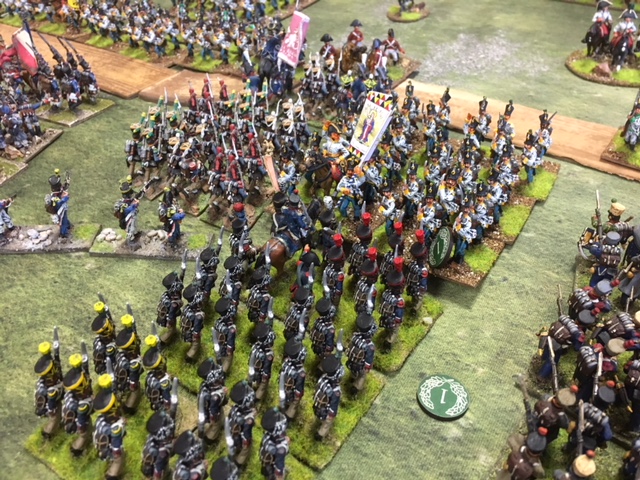
Its been a long time but yesterday we made a return to Regimental Fire & Fury in 15mm.
The focus was Heth's attack against Buford's dismounted cavalry and, beyond them, Wadsworth's infantry on McPherson's Ridge.
We pitted Heth's four infantry brigades plus two artillery batteries against Gamble's cavalry brigade and Wadsworth's infantry Division plus Hall's Battery.
My main source was Mark Adkin's "Gettysberg Companion" for unit stats and organisation.
I won the toss and chose the Confederates (I was joined in the afternoon after our lunch at The Nag's Head by Mike who took control of Davis' brigade for a while), Steve C had the Union forces.
With Forney Wood in the foreground, this is the view across the battlefield, Union troops on the left

This is Cutler's Brigade on the Union right, together with Hall's Battery.

Coming towards them are Davis' brigade, mainly Mississippians

across the Willoughby run, Gamble's dismounted cavalry are intent on holding up Archer's 3rd Brigade composed of troops from Tennessee and Alabama

Quick off the mark, Davis moves his brigade forward. Most of Cutler's men are on McPherson's Ridge but 56th Pennysylvania have pushed on between the ridge and Forney Wood.

Here's a closer look at Davis' brigade, now approaching the Run

Beside Herr's Ridge and the Tavern, a Confederate battery has unlimbered, beyond them behind the ridge, you can see Brockenbrough's brigade arriving - Archer's has come down the slope on the other side to attack the Union cavalrymen.

Doubleday, the Union 1st Corps commander is up on McPherson's Ridge himself to handle the battle

Across the Run, Davis sweeps in to attack Cutler's men

Meanwhile, in the centre, Archer's and Brockenbrough's men receive fire from the Union lines

In they go ! The North Carolinians attack some of Cutler's men

They gain the crest, as more Rebels chase through the gap

Here's a look from the other end of the battlefield at this point, waves of Confederates crossing the valley but against determined opposition

Some of Cutler's men are still hanging on grimly to the top of the ridge

But oh no ! Cutler is hit and mortally wounded !

Counter battery fire from Hall's Battery has knocked out one of the Confederate guns belonging to the Norfolk Virginia Battery

But its tit-for-tat as Hall now loses a gun

What now ? A second Rebel gun falls silent !

Davis' men now charge through Forney Wood

as the rest of the brigade tighten their hold upon the is end of McPherson's Ridge

Gamble's cavalrymen are now engaged in desperate hand-to-hand combat

This combat swings backwards and forwards, both sides trying to get the edge

One Confederate battalion is sent down the Fairfield Road to try and outflank the Union lines

So far, the Union are holding the line of the Willoughby Run

but weight of numbers is telling on the Union right where Cutler's brigade is wilting under the pressure

even though the enemy have been pushed back through the woods for now

One Union regiment finds itself with enemy both in front of it and behind it on the Ridge

The inevitable happens - Cutler's brigade breaks from contact - leaving Hall's Battery dangerously exposed

In the centre, Gamble's men has broken some of the Confederate units with their fire power but more Confederates keep coming

"We can't hold this lot for ever, Sir"

The Union men are forced back over the Willoughby Run

Back to the Union right flank - a Union Zoave Regiment that had been hidden in Shead's Wood now attacks the Rebels on the Ridge in the flank

but they are too small a regiment to cause any harm - they are dispersed

11th Mississippi endeavour to destroy the remaining Union men in front of them

as the North Carolinians celebrate the capture of the Ridge

The Union cavalrymen are grimly hanging on in the centre

Strangely, Mike had taken my advise on how to conduct a charge - and he lost !!! His large Mississipi regiment bounces off a small Union regiment (mainly because I told him not to reinforce the attack). The wagging finger tells you everything !

Oh well, I will have to sort this mess out now Mike is leaving us.

Way back on Herr's Ridge, Heth observes the fight as the Union regain the Run for a spell

Hall now limbers up his battery to get away before he is overrun by Cutler

Yet again, the Rebels force the Union troops back across the Run and hem them in against the ridge and Herbst Wood

47th North Carolina continue their outflanking move - they are part of Pettigrew's brigade, seen the other side of the white fences

At last, Union troops waiver and fall back aware that their flank is threatened

as 40th Virginia continue to push the enemy cavalrymen back into Herbst Wood

and two more admittedly battered Confederate regiments now come forward again to threaten the centre of McPherson's Ridge

One stubborn unit from Cutler's is still trying to hold off two regiments from Davis' command

Its backs to the walls, lads !

Melee on the extreme left of the Union line - the Rebel outflanking force has charged across the fences

The Rebels are into Herbst Wood

and more regiments threaten McPherson's Ridge

Its looking bad for the Union

and now, Gamble, the cavalry commander is killed

The Union men cannot hold this line much longer

Shooting through the trees before a charge


Brother against brother

Davis men now turn their attention to the centre

and a flanking charge made against Doubleday's position where Hall's battery had moved

Pushed back on all sides, the Union commander orders a withdrawal in an effort to save some of his troops for later. Limber up !
A gripping game - it was surprisingly easy to pick up the rules again. We'd forgotten how good they were.
Mustn't leave it so long next time.