Bob, Steve and I descended on Graham's place today, to get in some practice with Black Powder American War of Independence fighting as this is what we will be putting on at Salute this year.
Graham and Bob played the Americans, Steve and I the British. To make it more interesting and random, we diced to find out the fighting qualities of the brigade commanders - for the Americans this was an unmitigated disaster as most fell into the "poor to useless category" ! This made their chances of getting their men to perform adequately quite slim. Only the General possessed good command qualities.
By contrast, the British threw well and the brigade commanders were good.
The Americans are shown here, across a river, awaiting a British attack.
Bob's command is flanking a farm up the far end of the table, where my troops will be entertaining them
Graham's men are facing across the river where Steve's troops will appear.
First off, my lead elements appear and start crossing the bridge near our base edge.
Bob's cavalry brigade appear in the distance.
and an American infantry brigade near the centre.
My troops continue to file across in column.
Steve's cavalry lead the way towards the river in our centre.
Another strong American brigade enters the table facing them
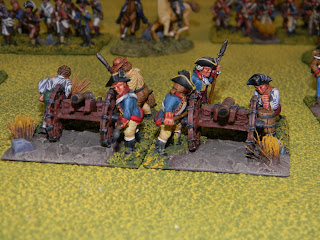
Steve gets his three guns into position beside the cavalry
My first brigade of infantry now turns into line to face the enemy
At this point, Bob throws a double six in the Command phase, which In Black Powder is a "Blunder".
On checking he finds that his newly arrived cavalry have turned around and gone off the battlefield before a shot is fired !
However, American infantry have advanced to the river bank in the centre, despite their brigade commander's poor rating.
Bob's infantry and guns have ignored the antics of their cavalry and deployed to face my men.
Steve's three gun battery opens very effective fire, causing casualties and disorder in the American ranks across the river
A Continental brigade is manoeuvring to cover the bridge
which is threatened by Steve's skirmish troops
Two of my British units advance towards the enemy, whilst the rest of the brigade tires to shake itself into some sort of order
and I get a battery of artillery unlimbered next to the river to start harassing the enemy
The Americans seem to have a good hold of the river line even if Bob's end appears like a refused flank from here !
These Continentals mean business !
Steve now has light infantry up with the skirmishers exchanging fire across the river
as his cavalry wait to see what develops
My deployed infantry await support before advancing any more
as Bob's cavalry return onto the battlefield as if nothing had happened !
His infantry are probably raising their eyebrows at this point !
Not than I can gloat - my second brigade have also thrown a "Blunder" and turned right at the bridge, not left where they should be heading !
Steve's relentless artillery fire is pushing back the enemy infantry with mounting casualties and disorder
Bob has now thrown forward some riflemen by the farm and they are starting to hit my infantry
Which still awaits the rest of the brigade !
The Grenadiers are taking for ever to move up on the right of them.
and the fourth battalion is skulking around the edge of the board.
This shot shows how the Americans have been pushed back from the bend in the river by artillery fire
but Graham's gunners are starting to hurt the Light infantrymen across the river from the Continentals
In fact, Graham and Bob's gunners are working in concert and concentrating all their fire on these unfortunates
At last ! I'm getting my men on the move
The Grenadiers supporting the right of the line and other units getting into position as support
We advance again
Steve now has a Hessian lead brigade arrive in the centre as a ford is discovered to the left of the bridge
Graham's men need to spread out to cover this threat to his right
Hurry up men !
The British light dragoons have been pulled back due to mounting casualties from fire.
My infantry and guns are concentrating their fire on Bob's cavalry
so his infantry change face to provide some fire support
Stung by the infantry fire , Bob's cavalry launch a charge
They make contact
but are narrowly beaten off with disorder in the ranks
The Hessian brigade now reaches the river, ready to cross over
Totally stranded in no man's land by disorder, Bob's cavalry are unable to move and keep getting hit by cannon and musket fire. They are also blocking Bob's infantry from firing back.
The Hessians start to cross the ford
This must roll up the American right surely ?
But Graham's Continentals react
and shift to cover the Hessian attack
My two brigades slowly advance despite harassing fire from the riflemen by the farm
One enemy cavalry unit has now broken because of high casualties
Steve's cavalry still wait in reserve in case a break through happens
Unbelievably, Graham's infantry have charged the Hessians and thrown them back across the river
This wasn't in the script !
But with my two powerful brigades advancing menacingly
and with another battery of artillery playing on Bob's infantry
The American commanders decide its time to withdraw before they are outflanked
Time to pack away !
The Americans performed with credit bearing in mind the command problems they had and it took an age for my attack to develop, thanks to some bad dice rolls holding up the second brigade.
Challenging but fun.
We do like Black Powder !


