Monday, 30 April 2018

ACW Sharp Practice

With several members still recovering from Hammerhead up at Newark yesterday, we did not expect too many members at the club today, so Allan and I had opted for a small skirmish game.

As it happened, Graham and Ian looked in and helped out.  Also next to us, several players were having an interesting 15mm Napoleonic game using Dave Brown's General d'Armee rules.

Back to our game, Allan had brought his Confederates along and chose to attack across the board which was dominated by a village in the centre.

My Union troops had the job of defeating them !

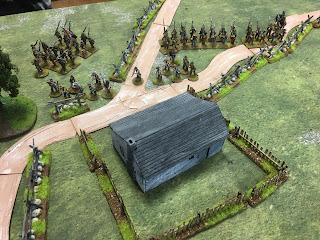
Union will attack from the left, Confederates the right.

First on, Allan gets some groups on the road & in the fields

Union troops appear opposite

Union skirmishers quickly get across and occupy the churchyard

Plenty of Rebels heading for the village !

The Union skirmishers open fire

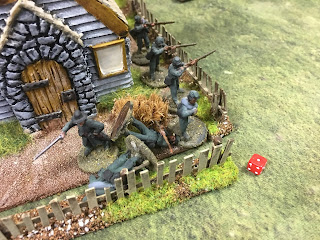
Faced by the Rebel ones in the grounds of a cottage

First blood to the Confederacy !

Union troops using the cover of some trees to advance

An impressive Rebel formation crosses the fence line, left flank of the Confederate force

the skirmishers keep up their fire

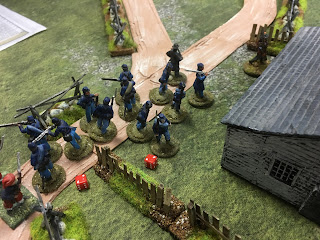
Now a Union formation marches up the road with the Commander in the lead (the skirmishers have wisely gone into the church to get away from the enemy fire !

Another rebel formation is spotted behind the brick house
 
The Rebel big formation moves forward

Union troops scuttle towards the white house which will give them a good firing position.

Here we can clearly see the Rebel formation now beside the red house (more skirmishers are inside the building)

The Rebel skirmishers come out of the cottage

The Rebel big formation is making for the white house

The Union leader has charged the Rebel formation near the red house and broken them !

Next, they charge the red house and defeat the enemy skirmishers lurking in there.

Despite having the cover of the white house, a Union officer has been hit and killed by enemy fire - they are now leaderless, so shock will mount unchecked.

Having cleared the red house, the Union commander now leads his men out of the front door of the red house.

They shoot up the already broken Rebels lurking in the fields

then turn their attentions to the enemy skirmishers who have shot back into the cottage - the Rebel formation, hearing all the commotion turns to face this new threat.

Charge ! The Union boys head for the cottage

With victory here, this means the Rebels have lost four units and their morale is in free fall.

Victory to the Union today !

One question for you Sharp Practice experts - were we correct to allow Supports when attacking a building ?


Friday, 27 April 2018

New Wargames Shed !

Not mine, but Steve Clarke's, which has been many months in the making.

Yesterday, we had a "soft opening", a trial game before the much heralded official opening which will doubtless be attended by royalty, members of government and celebrities from far and wide !

And here it is - minus the bike shed annex, which is to follow

The table is 10' x 6' with ample space around three sides for access. Steve had set it up for a Black Powder Napoleonic game, to which end, I brought along my Bavarian battalions.

The idea was that the winner would be the side that had control of most of the road entry points and the river crossings at the end of the day. We fought along the long ends and diced to see who would come on from the end against the far wall - me as it turned out.

Because of the distance, I was given a free move which enabled my cavalry brigade consisting of a unit of Hussars, a unit of Dragoons and some Lancers (all French) in getting to the hill observing the main river crossing - a  bridge.

My right flank was made up of a brigade of Bavarian infantry (four units plus a gun) and they marched steadily alongside the river.

My other infantry brigade (two of Bavarians, one Swiss & one Polish battalion plus a gun) entered the main central road in column, skirmishers out front.

Observed by the General and his ADC in mid stream !

Steve had an Austrian force - his Commanders are seen here conferring.

In the centre he had a a cavalry brigade consisting of Lancers, Dragoons & Hussars

A column of four infantry battalions on the left with supporting gun

and four more battalions this time in line, on the right - accompanied by one gun. Plus skirmishers in each case.

We both had "big" battalions giving extra fire power and hitting power in melee.

This is the Austrian C-in-C, 

I decided to detach my Hussars and send them off to delay his right hand brigade.

They took station next to a small wood abutting the river.

My central infantry brigade has orders to march to the bridge.

watched by my two remaining cavalry units on the hill.

Steve decides to advance two infantry units to fire at my Hussars

These very units ...

Whilst on his left, a battalion has formed line ahead of his advancing columns, ready to take on my Bavarian brigade.

The brigade commander alongside the columns.

My leading unit, the Poles, have reached the bridge

Whilst my Bavarian brigade carries on the advance in force on the right, firing and disordering the foremost Austrian battalion

Steve had pushed forward some skirmishers into the wood beside my Hussars, so my skirmishers were sent forward to deal with them

which they did in short order, destroying the enemy and capturing the wood.

Here's a view of the Bavarians bearing down on Steve's lead battalion

His supporting units now deploy into line too before moving up.

On Steve's right, two infantry battalions move forward once more

This is a view down the table, mid way through the day, Austrians in the fore ground, Franco-Bavarians coming towards the camera.

Charge ! The Bavarians attack, by-passing one unit which has been disordered by enemy fire.

Over by the bridge, the Poles hold whilst their support battalions change into attack columns

Another view of the Bavarian attack

The Austrians rush to bring up support battalions

Now supported by Dragoons, my Hussars charge the Austrian infantry in front of them, aided by the skirmishers in the woods too

Here's a better view of the infantry changing formation from march columns to attack columns - developing wider frontages

The Hussars are successful and the enemy battalion is destroyed.

They pull back behind the Dragoons in order to rally.

My first Bavarian brigade attack was thrown back

but the Austrians are disordered (the white cotton wool denotes this)

The river line with Poles firmly in control of the bridge and supports alongside.

Charge again !  The Bavarians have another go

This time they break through on the right

This break through caused an Austrian Grenadier battalion to turn about - a perfect excuse for the Poles and supports to charge across the river and hit them in the back ! 

With such a powerful attack, there could be only one outcome - destruction !

Whilst all this was going on, my cavalry were ordered into the attack again, this time the Dragoons leading and the Hussars supporting

With the Austrian Grenadiers gone, my Poles, Swiss & Bavarian brigade are now faced by the Austrian Lancers - time to form square on the end !

My cavalry v Austrian infantry becomes a bit of a stalemate

but with the other Austrian infantry brigade broken and the Austrian cavalry unable to penetrate my infantry formations in the centre, the Franco-Bavarian force has a firm grip on nearly all the entry points and river crossing points

The Austrian commander orders a withdrawal.

We used the "Clash of Eagles" supplement for Black Powder, to add the appropriate flavour to the battle and this worked well.

So that's it, we have christened the new Wargames Shed and very comfortable it is too.  Unfortunately, it turned out that the planned tunnel to the pub was too expensive to build so we had to walk down the road to the Chequers for the obligatory pie and pint !

All good fun !