Friday 25 January 2013

Another Attack of the Aelfroths !

 
Yep, he's back and nastier than ever !
 
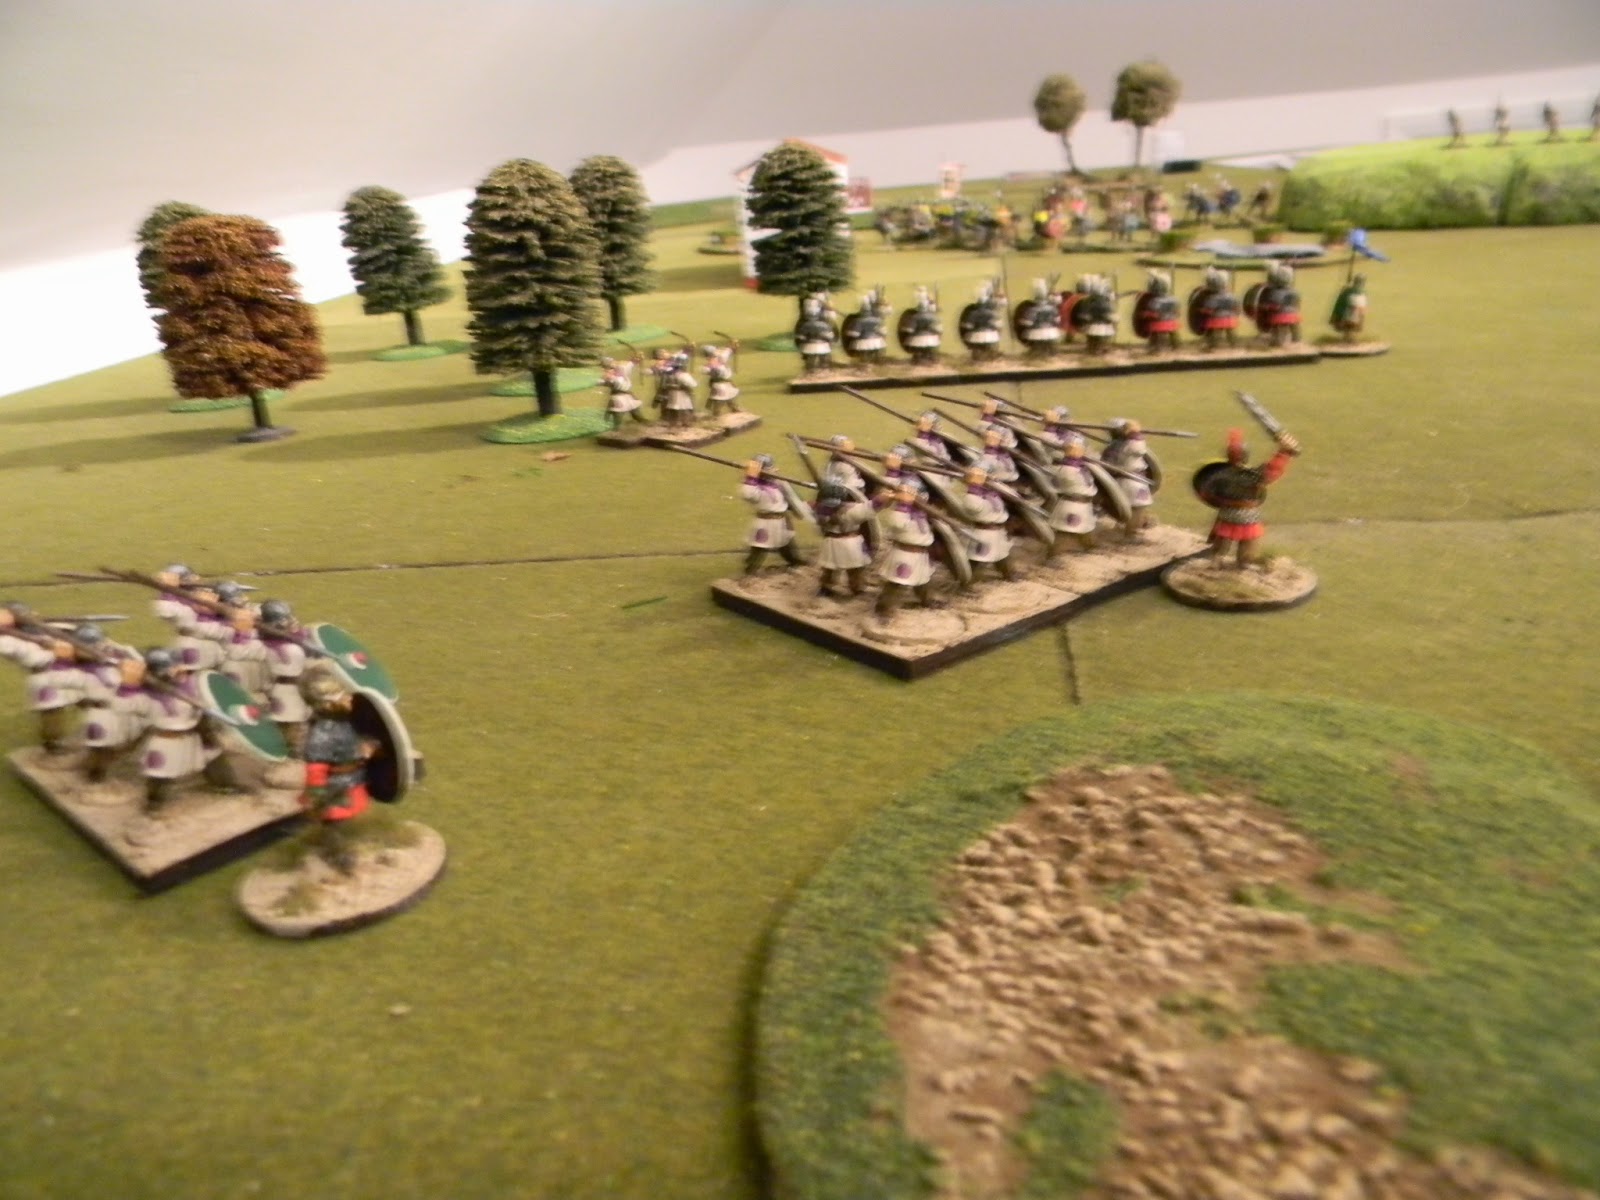
Nick Speller managed to get over to the Billericay War Rooms after work tonight, bringing with him his Romano-British army for another crack at the Saxon invaders.
 
He got off to a good start by raising his Morale Rating to 8 with the pre-battle events.

 
Using the fantastic Dux Britanniarum rules of course.
 
A good speech "bigged up" by our own Poet gave the Saxons a 7. After the decisive victory last time out, one of Aelfroth's groups had been elevated to Elite status from Warrior, so now 3 Elite and 2 Warrior groups plus boy archers.  Aelfroth was accompanied by his Champion and Cadwalladha and Wulfric plus the Scrop.
 
Nick's men were keen and rushed forwards.
 
Aelfroth's likewise.
 
Quickly occupying the ground between the old Roman villa and some rough ground.
 
The Saxon archers have a good vantage point.
 
Nick gets his Elite and Warrior troops up front first with Levy behind.
 
Cleverly, the Saxons lure the Romano elite troops forwards ahead of their Warrior support.
 
And then slam into them with Aelfroth and his Bannerman urging them on.
 
Half of the Romano Elites were killed and the rest retreated back to their line of Warriors.
 
Meantime, some Romano Levy appear in support.
 
One group of Saxon Elite, led by Cadwalladah decide to attack them without delay.
 
One group is thrown back but the next engage the Saxons.
 
The British commander mow takes the initiative and charges Aelfroth's men with his Warriors and the remnants of his Elite troops.
 
With some success as Saxons are cut down next to the woods.
 
Aelfroth's men are pushed back
 
One unit of Saxons broken beyond repair.
 
Battle is resumed as Aelfroth attacks the isolated Warrior unit.
 
Over on the Saxon left, hand to hand combat with the Levy continues.
 
The British Warriors are destroyed.
 
But in a surprise move, the British commander leads his remaining Elites to attack the Saxons engaged with the Levy in the rear.
 
They in turn are destroyed.
 
Now Aelfroth's remaining 2 Elite units tackle the 2 British Warrior groups to their fore.
 
And they are defeated.
 
 
By this stage, the Romano-British morale had collapsed and those still left alive fled the field.
 
This was a very bloody encounter with both sides incurring heavy losses which will take months to recover.
 
Aelfroth may have won but he was in no position to take advantage and had to return to his Hall with his winnings.
 
No doubt he will be back !

Sunday 20 January 2013

Bitten by Algy.

I've managed to Wargames quite happily for far more than 40 years without ever contemplating WWI  
air combat - until now !

Intrigued by all the talk about a new version of Too Fat Lardies rules, I found myself buying some Wings of Glory planes in readiness for the Algy relaunch (whenever that may be).

Why ? Haven't I got enough on my war gaming plate as it is ? Evidently not, as 6 planes sit awaiting combat instructions.

These are the German Fokker E.IIIs

And these the British "pushers" , 3 Airco DH3s.


It's absolute madness but the Lardies have done it again and got me enthused about a new subject.

Come on then, Rich, lets be havin' em !

Saturday 19 January 2013

The Battle of Hal, June 1815

(with kind permission of Ray Rousell & Posties Rejects gaming group in Gravesend)
 
Wellington having been beaten at Waterloo and thrown back towards Brussels, it falls to the reserve force at Hal to prevent the French from rolling up the Allied armies completely.  Is it at all possible the stem the Gallic tide ?
 
Brunswickers line the hedgerows to the left of Hal on the Brussels road.
 
Light cavalry to the right of Hal.
 
A brigade of Nassauers on the extreme left flank with the welcome support of some heavy cavalry arriving in the background. 
 
French cavalry arrive in force on their left (Cuirassiers & Lancers) with Hal seen in the distance.
 
A brigade of French infantry cross the stream on the French right.
 
The French lancers charge the allied light cavalry without delay.


Whilst another brigade of infantry advance in the centre, supported by a battery of foot artillery.
 
The Cuirassiers await their turn.
 
Against the odds, the allied cavalry beat the lancers (6 kills v 4).
 
The lancers have to return to their own lines.
 
The Brunswick cavalry could not resist pursuing.
 
The Cuirassiers & French infantry look on in disbelief.
 
Another welcome sight for the Allies - another battalion of infantry marches up the Brussels road towards Hal.
 
A skirmish screen leads the assault over on the French right.
 
With a battery of horse artillery providing covering fire.
 
The foot artillery keep pounding the line of Brunswickers.
 
Two columns press forwards left of centre.
 
The Allied light cavalry have chased the French lancers from the field.
 
The Cuirassiers charge past the infantry columns to attack the infantry besides Hal.
 
Not to be outdone by their light cavalry, the Allied infantry rebuff the Cuirassiers.
 
Whilst the French heavy cavalry are otherwise engaged, the Allied light cavalry return to their own lines.
 
Over on the French right, infantry change to line to try and reduce casualties.
 
 
 Whilst a column of attack heads for the hedgerow.
 
The French horse artillery move forward.
 
One French battalion recoils from the attack.
 
And the Cuirassiers return to their own lines.
 
The Allied light cavalry has reformed next to Hal ready for more action.
 
Now a French column hits the Allied line.
 
Again, they stand firm as the Brunswickers prepare to come to their aid.
 
Like this.
 
The Allied heavy cavalry advances and then stops in its tracks. No charge ?
 
They pay for this indecision with a volley from the French infantry and cannon fire from the horse artillery.
 
They retire with heavy casualties.
 
Meanwhile, the French column assailed from two sides heads back to safety.
 
The Cuirassiers are trying to rally at their start line.
 
The French now press forwards in line on their right.
 
Here's an over view at this point in the battle.
 
Both sides exchange volleys trying to seek an advantage.
 
One battalion has crossed the hedge line into the fields ahead of the horse artillery.
 
The French foot gunners continue pounding away.
 
With his left in retreat, the French general wonders where his promised reinforcements are.
 
This should not be happening he thinks, as the Allied infantry now come forward.
 
They obviously hadn't read the script !
 
In the fields an Allied column attacks the French line just over the hedge line.
 
At last, the Allies waver over on their extreme left.
 
The French commander hopes this is the breakthrough he has been seeking.
 
At last, a fresh battalion appears on the left but is this all ?
 
The Allies are urged forwards by their general.
 
The two batteries of French artillery continue their deadly work.
 
One Allied battalion has retired on the far left of the line.
 
The Cuirassiers continue to take casualties as they try to rally.
 
Have the French enough strength left on their right flank to push home the attack ?
 
The Cuirassiers break off again as morale fails.
 
The French line is forced back from the fields.
 
And they pin the horse artillery battery in the process.
 
They refuse to rally.
 
And this loss of elan is transmitted to the other regiments - they retreat too.
 
Looks like the Cuirassiers are off leaving the one infantry regiment to fend for itself.
 
The gunners try to stem the tide.
 
With a general collapse on the French right too.
 
The overconfident Allied light cavalry try and charge the fresh French infantry.
 
But are flung back.
 
The horse artillery fire once more before limbering up. 
 
Both French batteries are ordered to retire by a forlorn French HQ.
 
Despite Steve Clarke braving the threatened snow storms and coming over to Billericay for this battle, he was thwarted by the dice as the reinforcements necessary for his French attacks never arrived (apart from one lone infantry battalion when it was too late to make a difference).
 
Even so, it was a close fought game and it hung in the balance on more than one occasion.
 
However, Wellington has been given some breathing space by this victory, so all is not lost yet in Belgium !