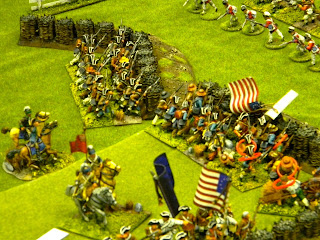
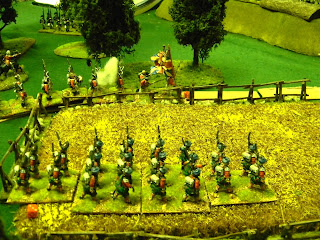
Rafael organised this one, provided the earthworks and umpired, Graham provided most of the figures, me the buildings and British Light Infantry skirmishers plus two artillery pieces.
I won the toss, so opted to be British, so Graham was the American.
Here's the rule book.
The Bunker Hill scenario
Notes and forces
View from behind the American position at the outset
View from behind the British position with Light Infantry advancing to the right of the marshy area, 12pdrs on the hill
The Light Infantry are encouraged to push on with some deployed in skirmish formation out front
Here's Stark's New Hampshire troops behind the fence line
Knowlton's Militia behind earthworks
Robinson's skirmishers in the ground between Charlestown and the high ground
The "Lights" advance straight ahead towards Stark's men
The 52nd & 5th behind them have to navigate the marsh.
The 12pdrs open fire on the earthworks
Meanwhile, Pigot rushes the 43rd & 38th up the road into Charlestown.
Here we see Prescott's men behind the earthworks and in the redoubt
Robinson's men harass Pigot's columns
Stark's men wait for the enemy to get into range
The 38th are ordered to attack the enemy skirmishers, who back off
The Light Infantry steadily advance despite taking a few casualties
As the 58th & 5th clear the marsh
and then gather pace as they face the earthworks
Stark's men have been ordered to form up into column and move across the rear of the American position, ignoring Howe's Light troops.
Enemy skirmishers dispersed, the 43rd continue their advance in column towards the redoubt as the 38th get past the church.
Now all the British units are in position to attack the American defences
The Grenadiers & 38th prepare to charge as the 43rd decide to drive off those pesky skirmishers again before they can attack the redoubt.
The Militia in the redoubt watch all this with interest
Howe's Light Infantry now trade shots with Woodbridge's men
as the 52nd & 5th lead the charge against the earthworks, jay where the American 3pdr gun is situated.
With their brigade commander with them.
Simultaneously, the 43rd & Grenadiers climb the heights and assault the enemy defences, urged on by Pigot.
The Militia stand firm.
General Howe (C-in-C) has moved up to get a good view of the proceedings
Here's the American view of the Light Infantry attack
The Grenadiers make it to the top, despite heavy fire
but lose the ensuing melee and are pushed back, as are the 43rd, only the 52nd & 5th have succeeded - a British flag is on the summit !
Proud moment for Howe's men.
But it is short lived - the Grenadiers try again
and fail - many casualties and a retreat forced upon them !
Surely, the combined forces of the 43rd and 38th can carry the redoubt ?
Perhaps the spotted the Grenadiers in retreat ?
Whilst this is going on, Stark's men are moving in column around the back ready to threaten the British flank or rear. We can see clearly that the 52nd & 5th are in the enemy defence positions and now attacking an American infantry unit in the flank.
Those Americans break, but so have the 43rd Foot !
Before the 52nd & 5th can reorganise,
you can see the gap in the American positions but no British support remains for 52nd & 5th as the Light troops have contented themselves with exchanging fire with their counterparts.
As a final throw of the dice, Howe orders forwards the 38th to attack the redoubt - but they fail.
Somehow, against all the odds the American Militia have held the redoubt against all comers.
The British are forced to accept defeat.
A good first attempt at British Grenadier for us, trying to get to grips with Disruption Points (the little red dots represent these in our game) which especially affect units trying to move around the battlefield.
Definitely one to have another go at again soon.
Finally, a couple of shots of other games going on at the club -
Steve Clarke introducing Ian Roberts to Dux Britanniarum, using my Romano-British, my buildings and Steve's Saxons.
This ended up a Saxon victory but Ian enjoyed it enough to announce he is buying the rules and the figures from Too Fat Lardies !
Here's Mike playing Lion Rampant - he's not alone (!) the other players managed to duck out of the shot somehow.
All together, there were eight games on the go with more than 30 players involved so a good turn out for Essex Warriors today.


